Scott Visagie • Dec 22, 2022
11 steps • 33 seconds read

Go to
1.Zendesk

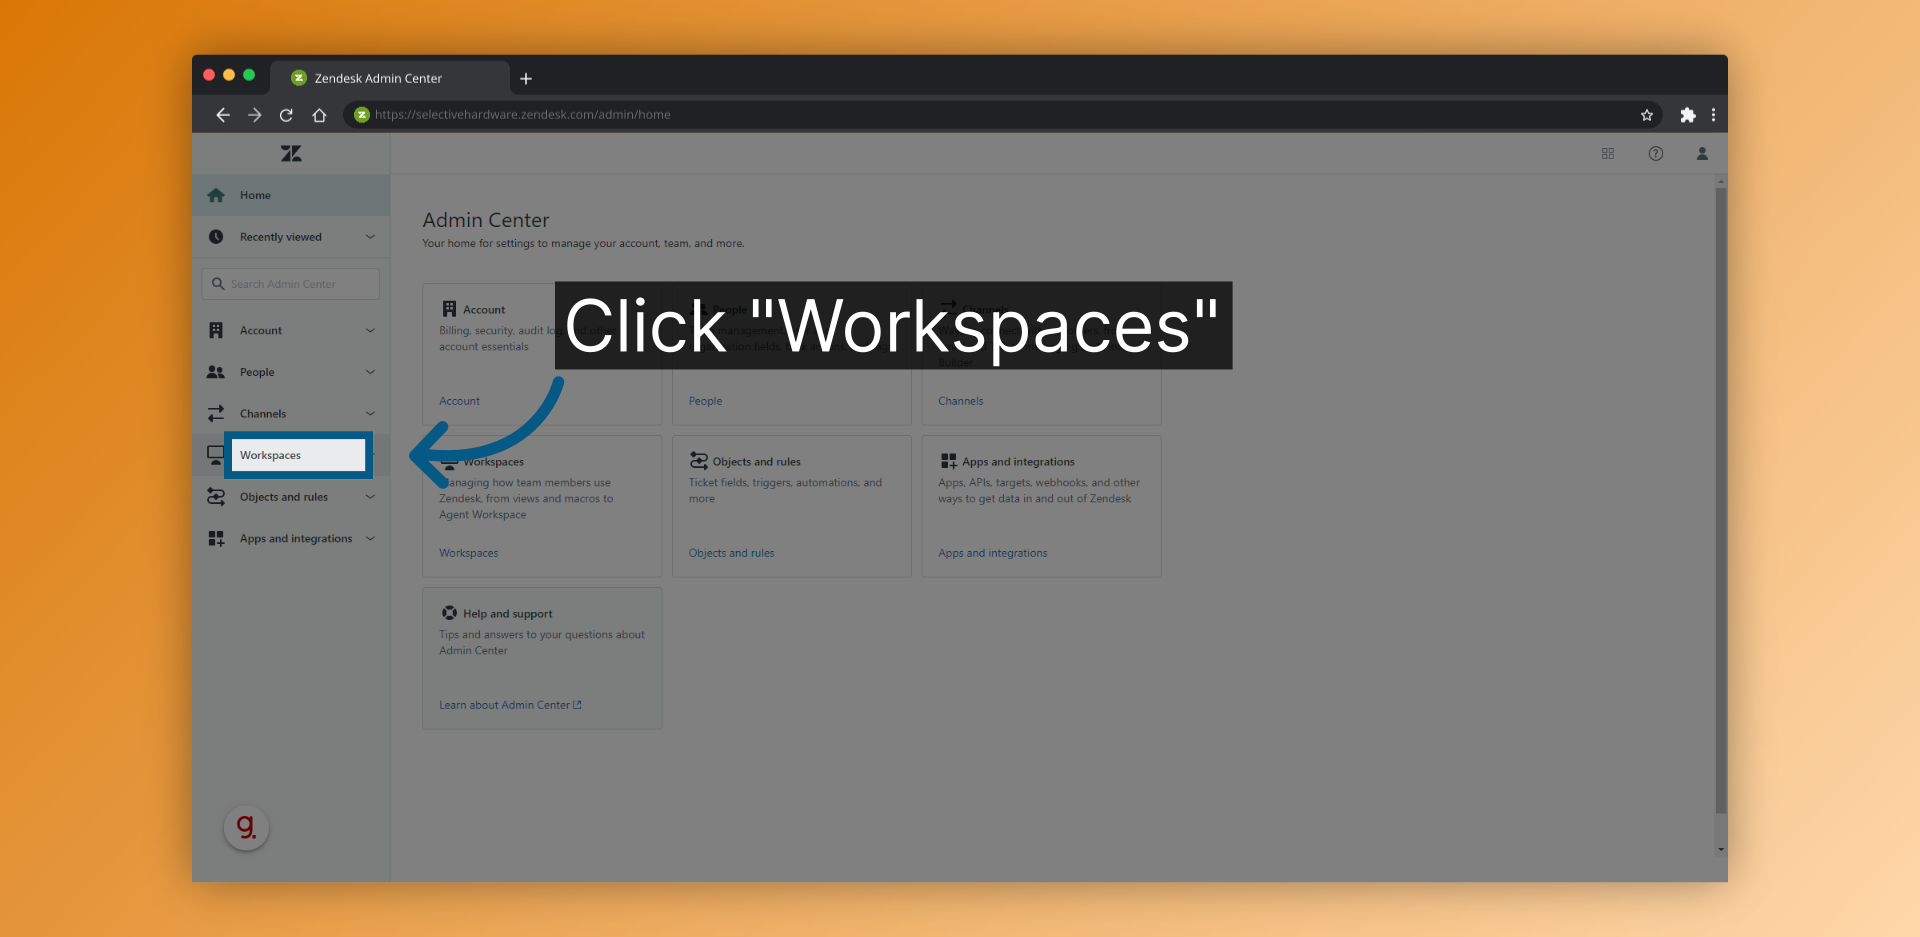
2.Click "Workspaces"
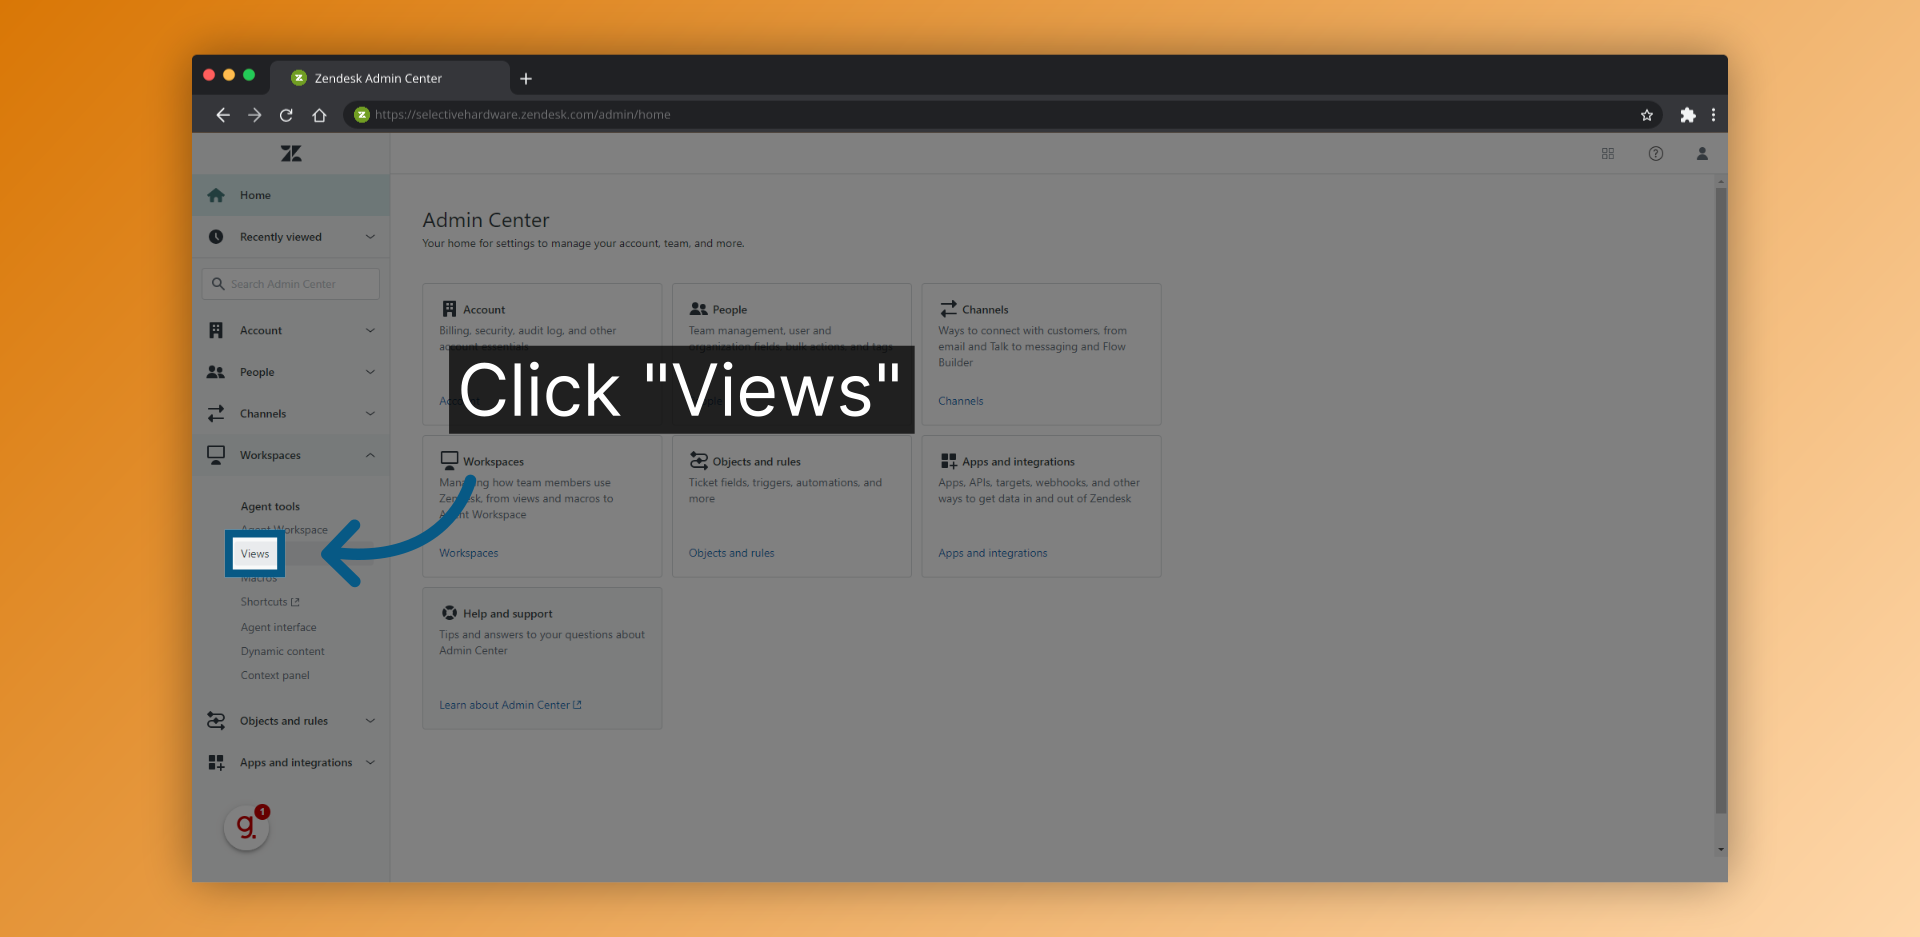
3.Click "Views"
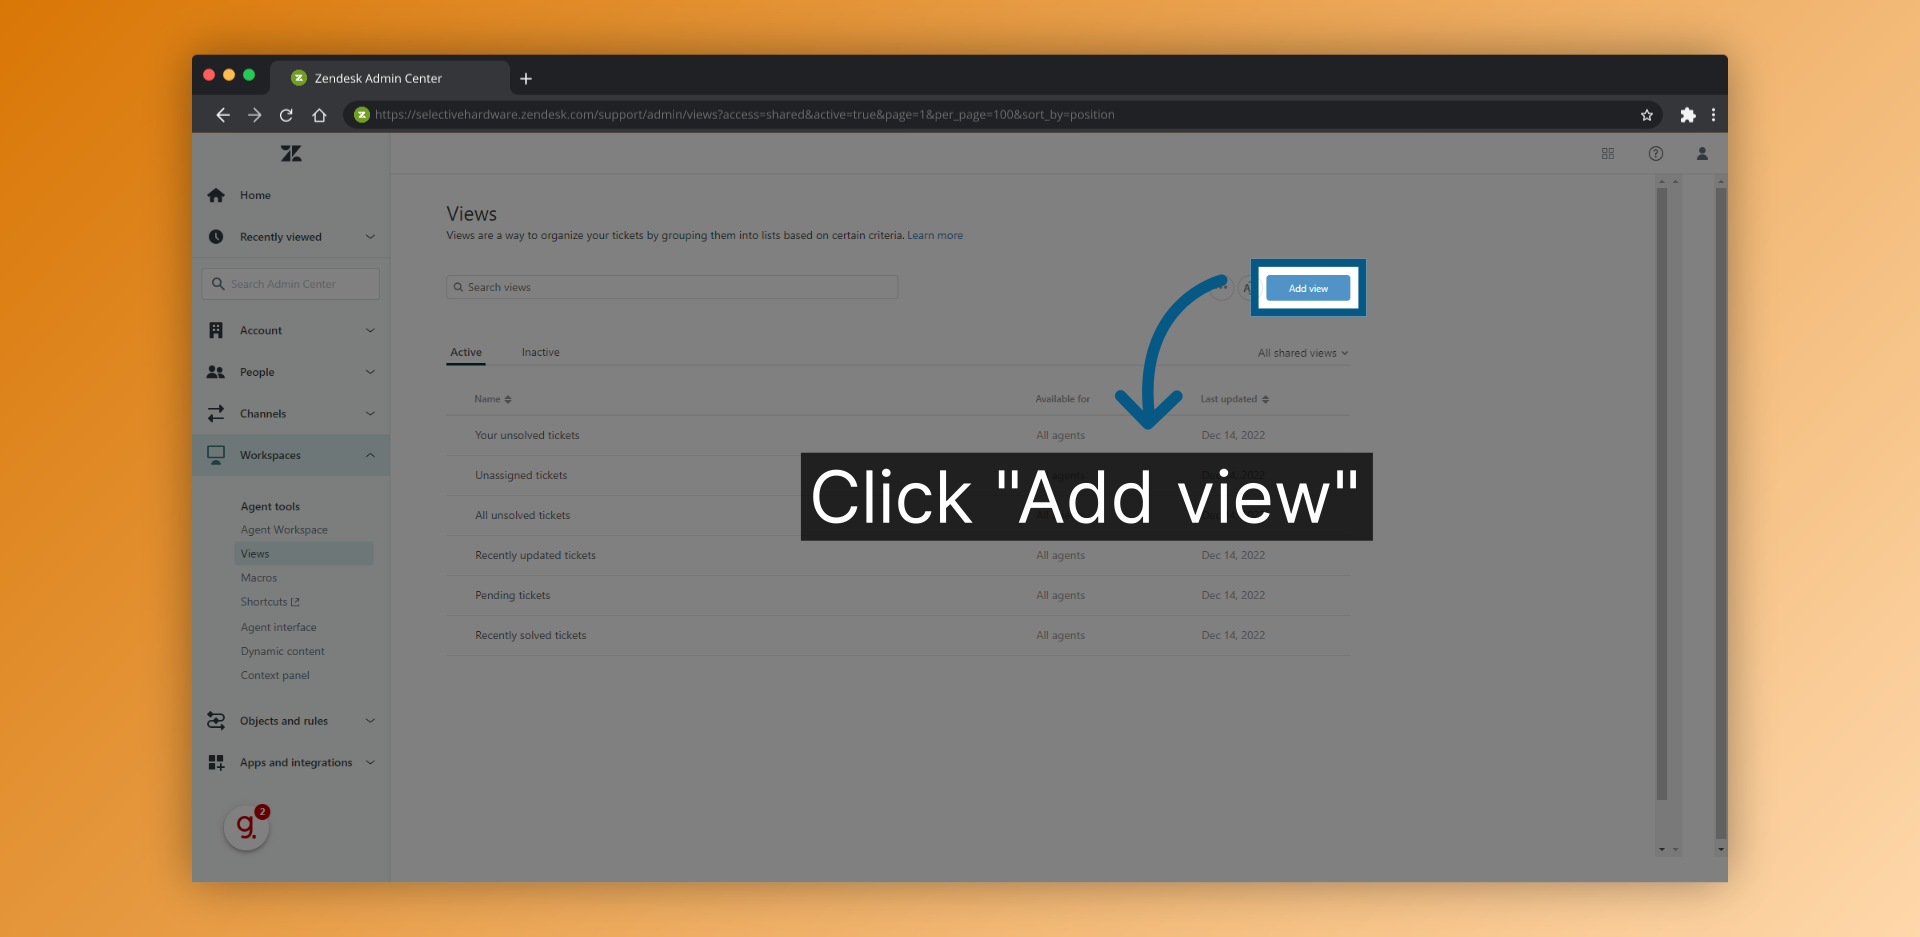
4.Click "Add view"
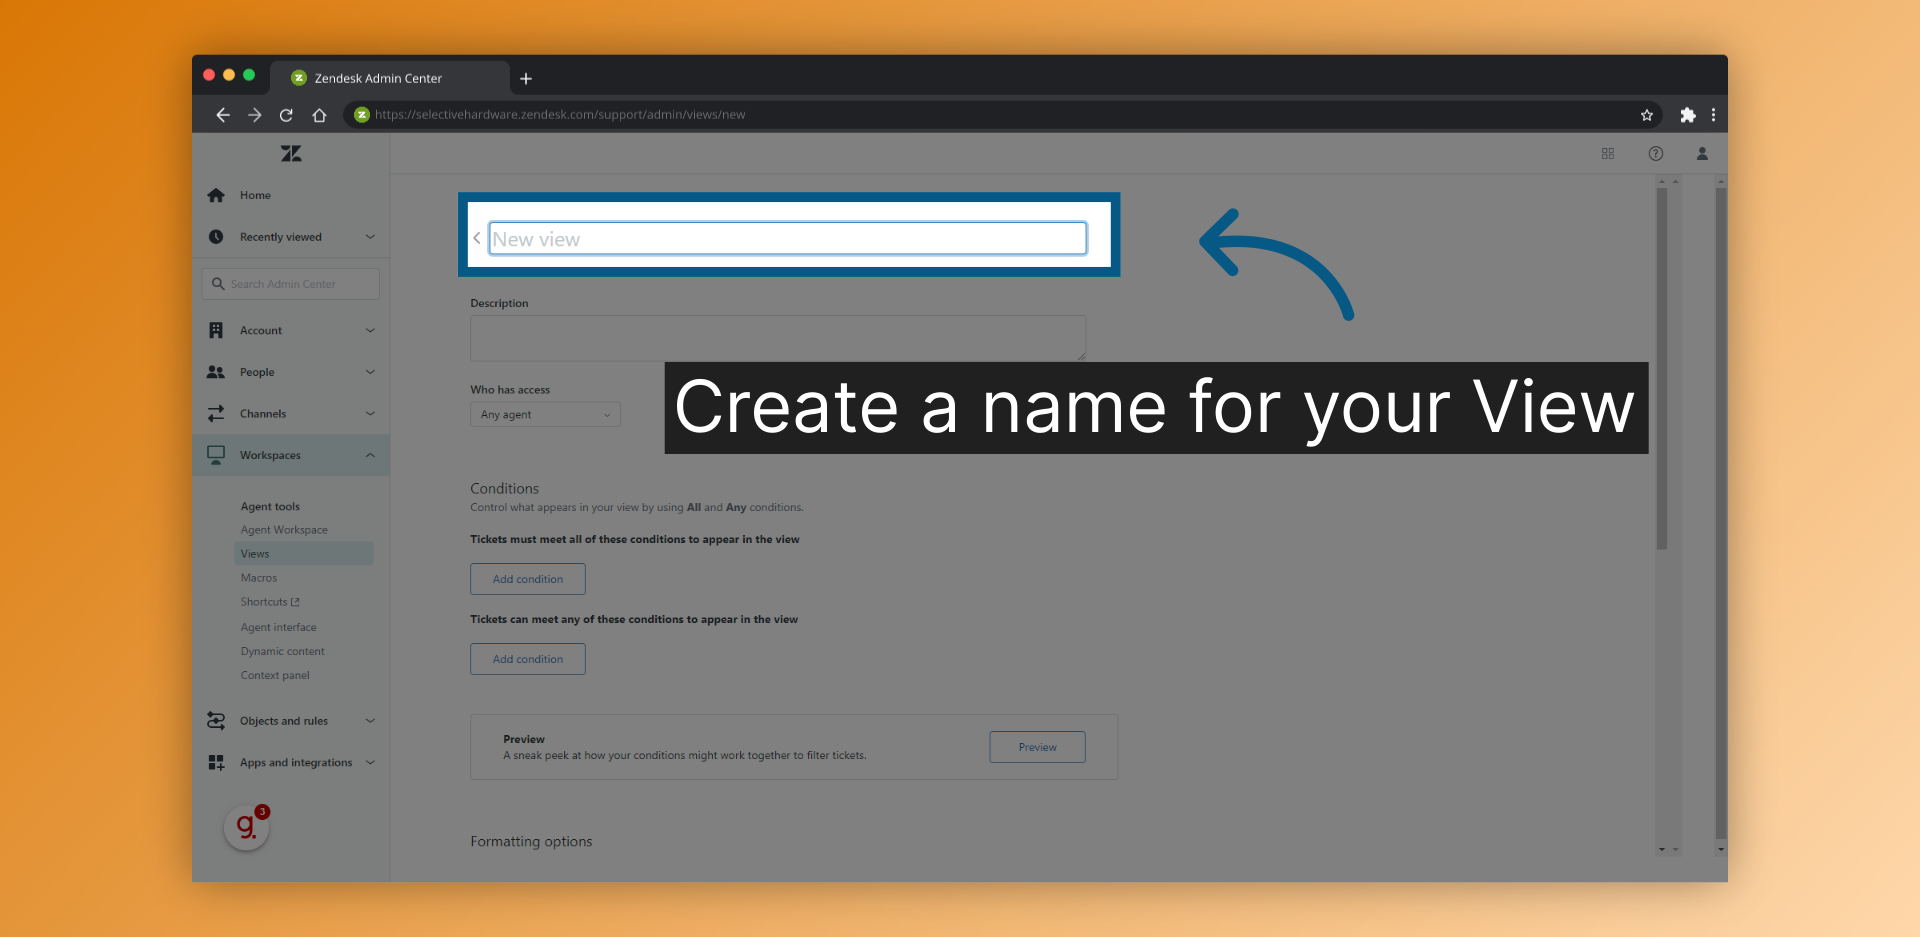
5.Create a name for your View
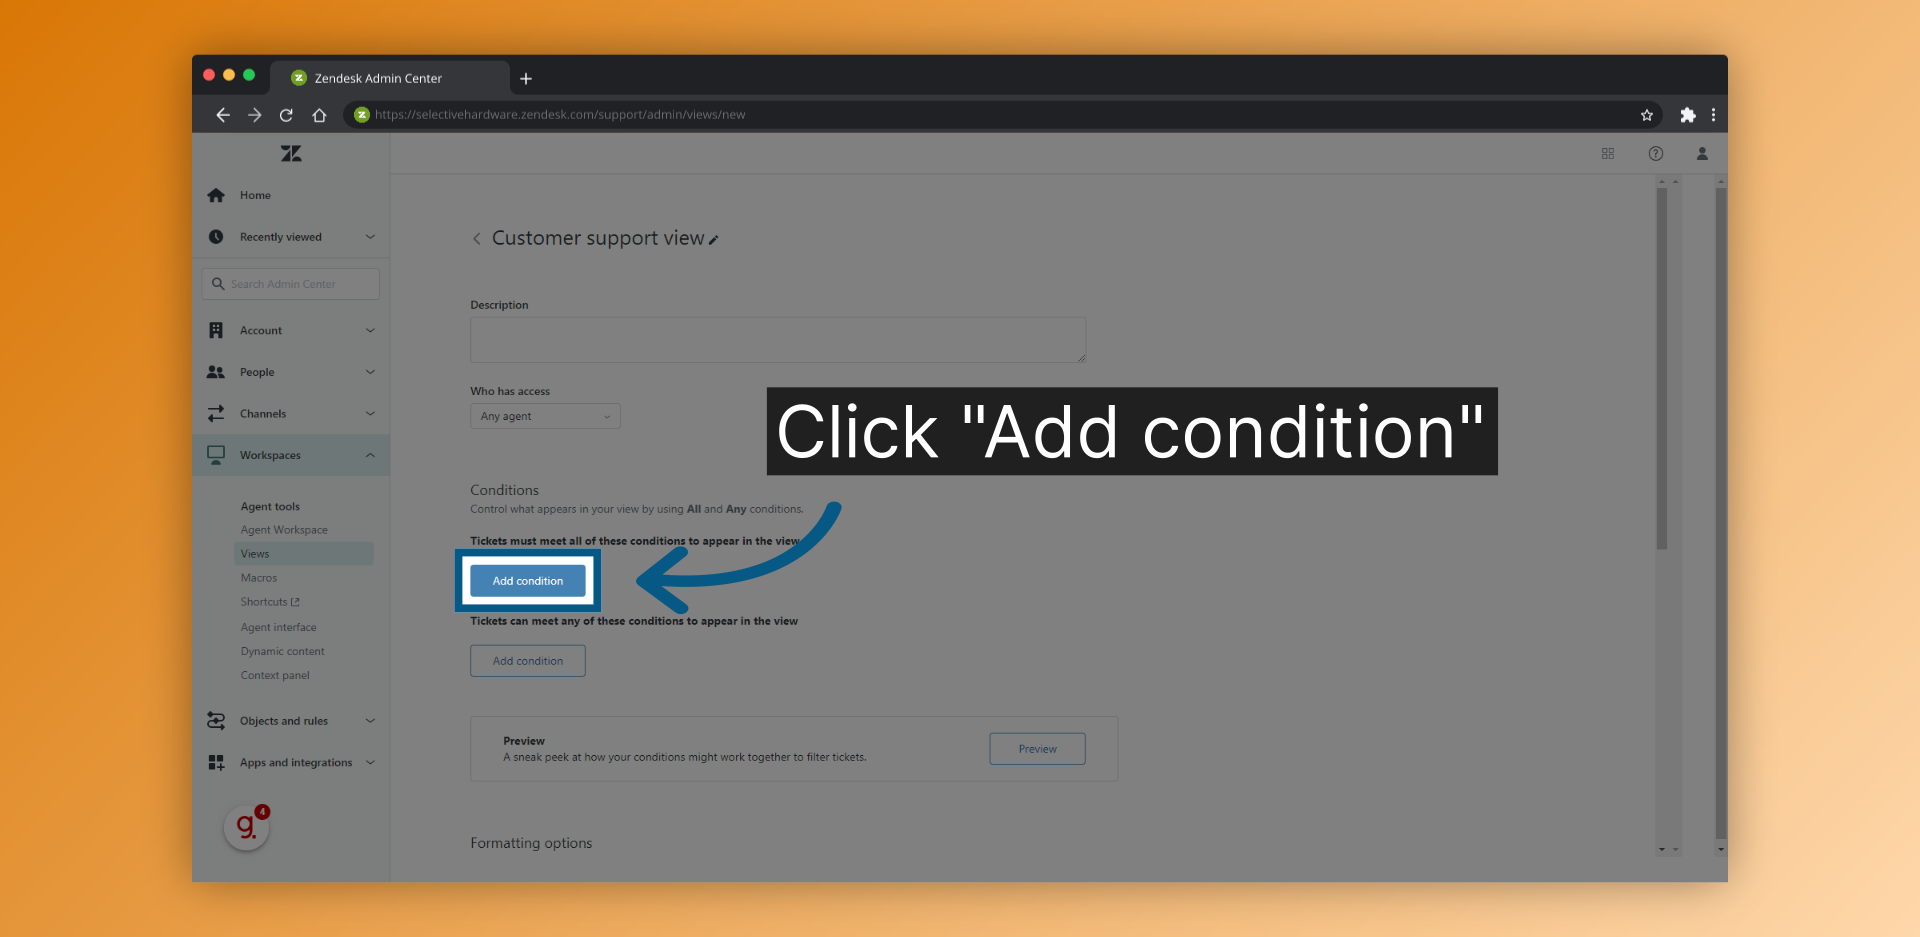
6.Click "Add condition"
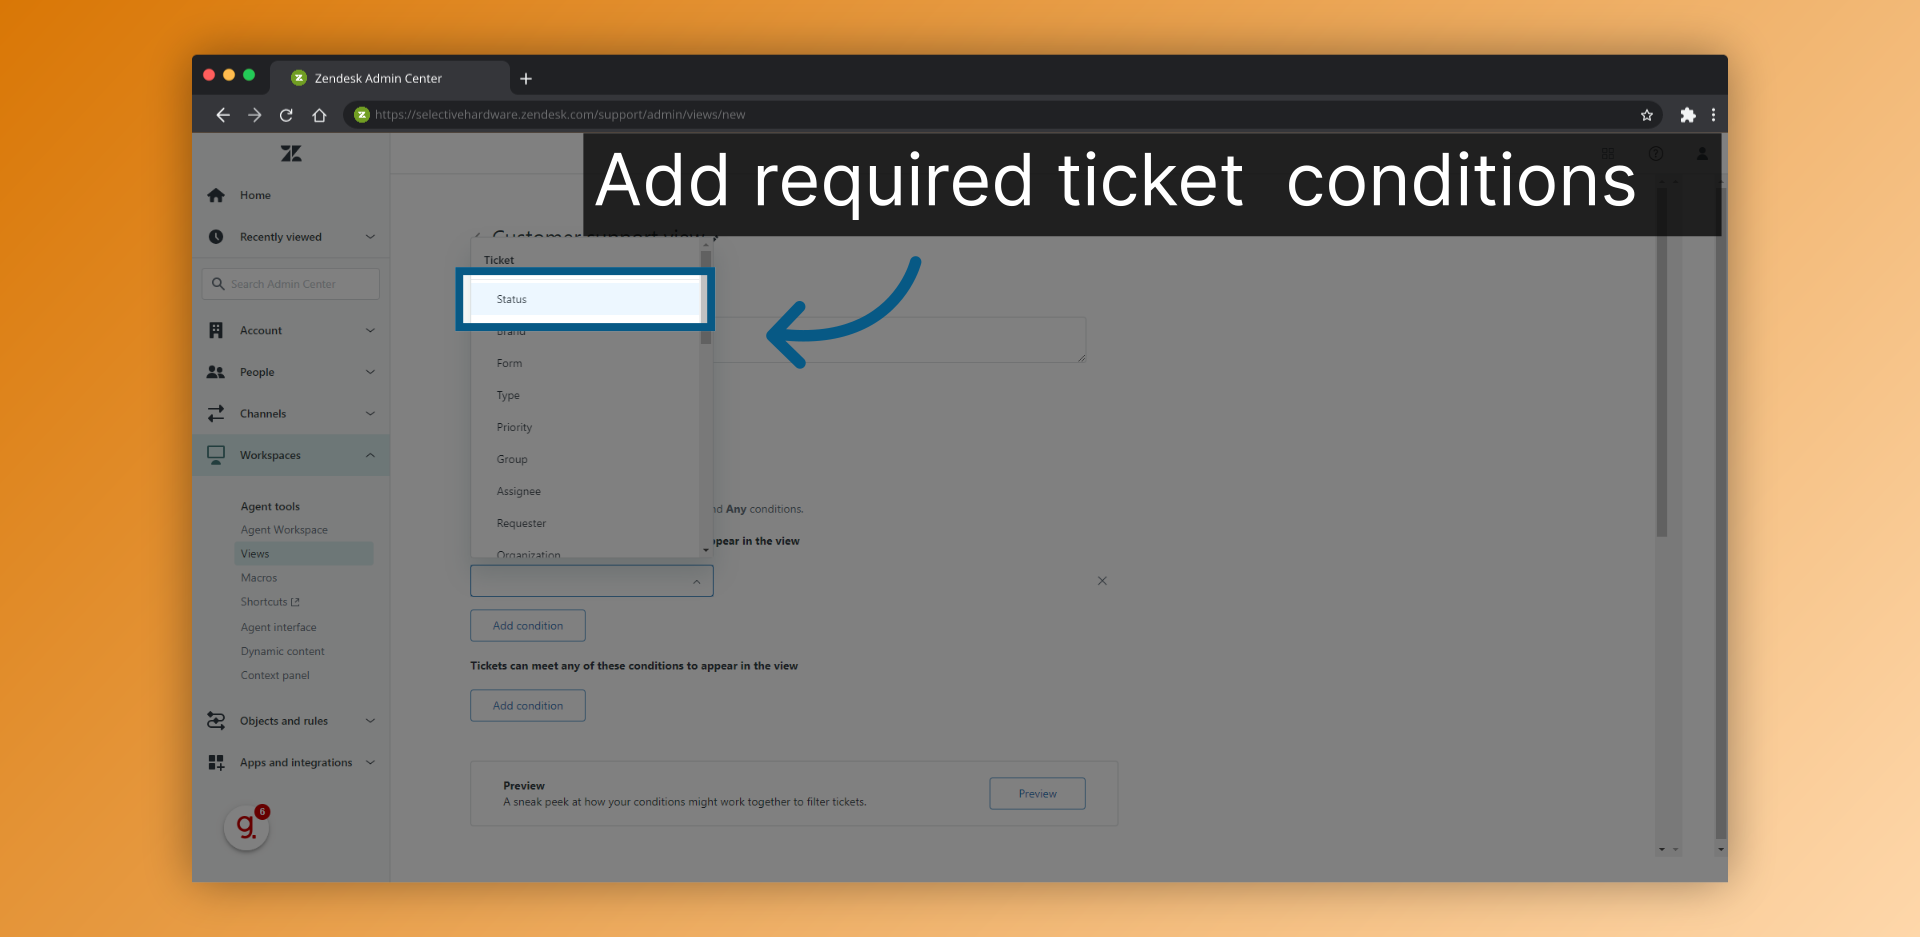
7.Add required ticket conditions
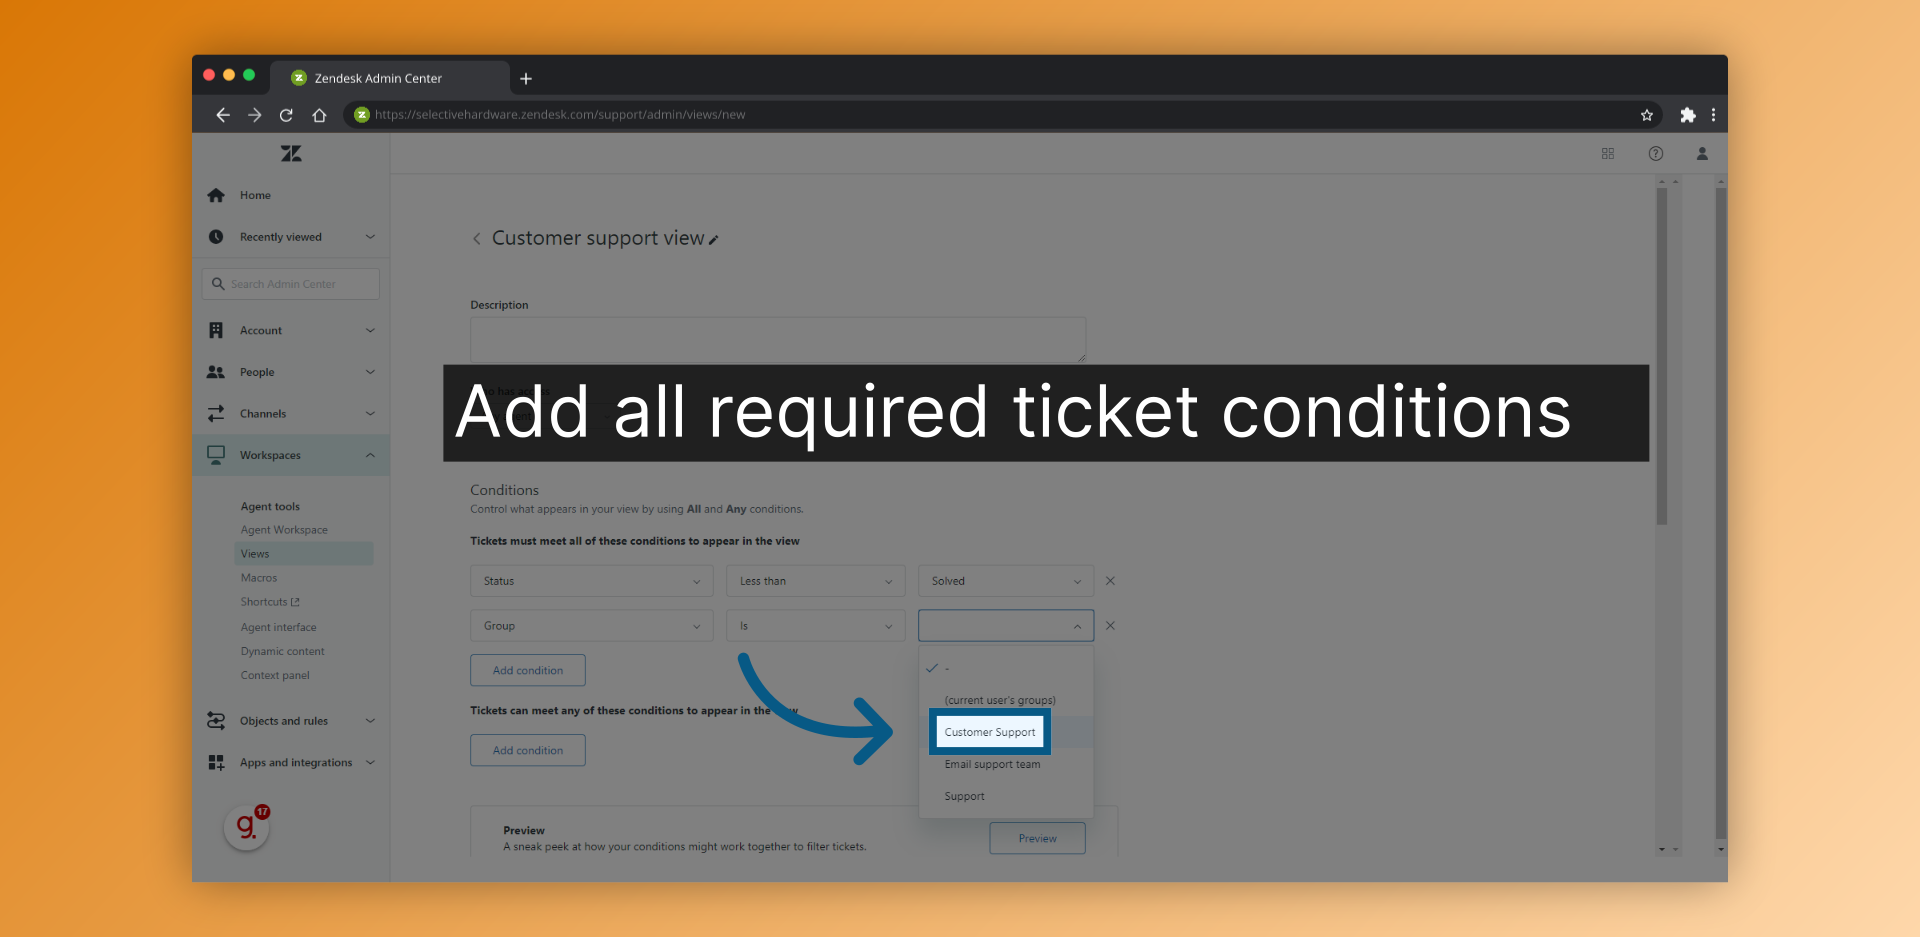
8.Add all required ticket conditions
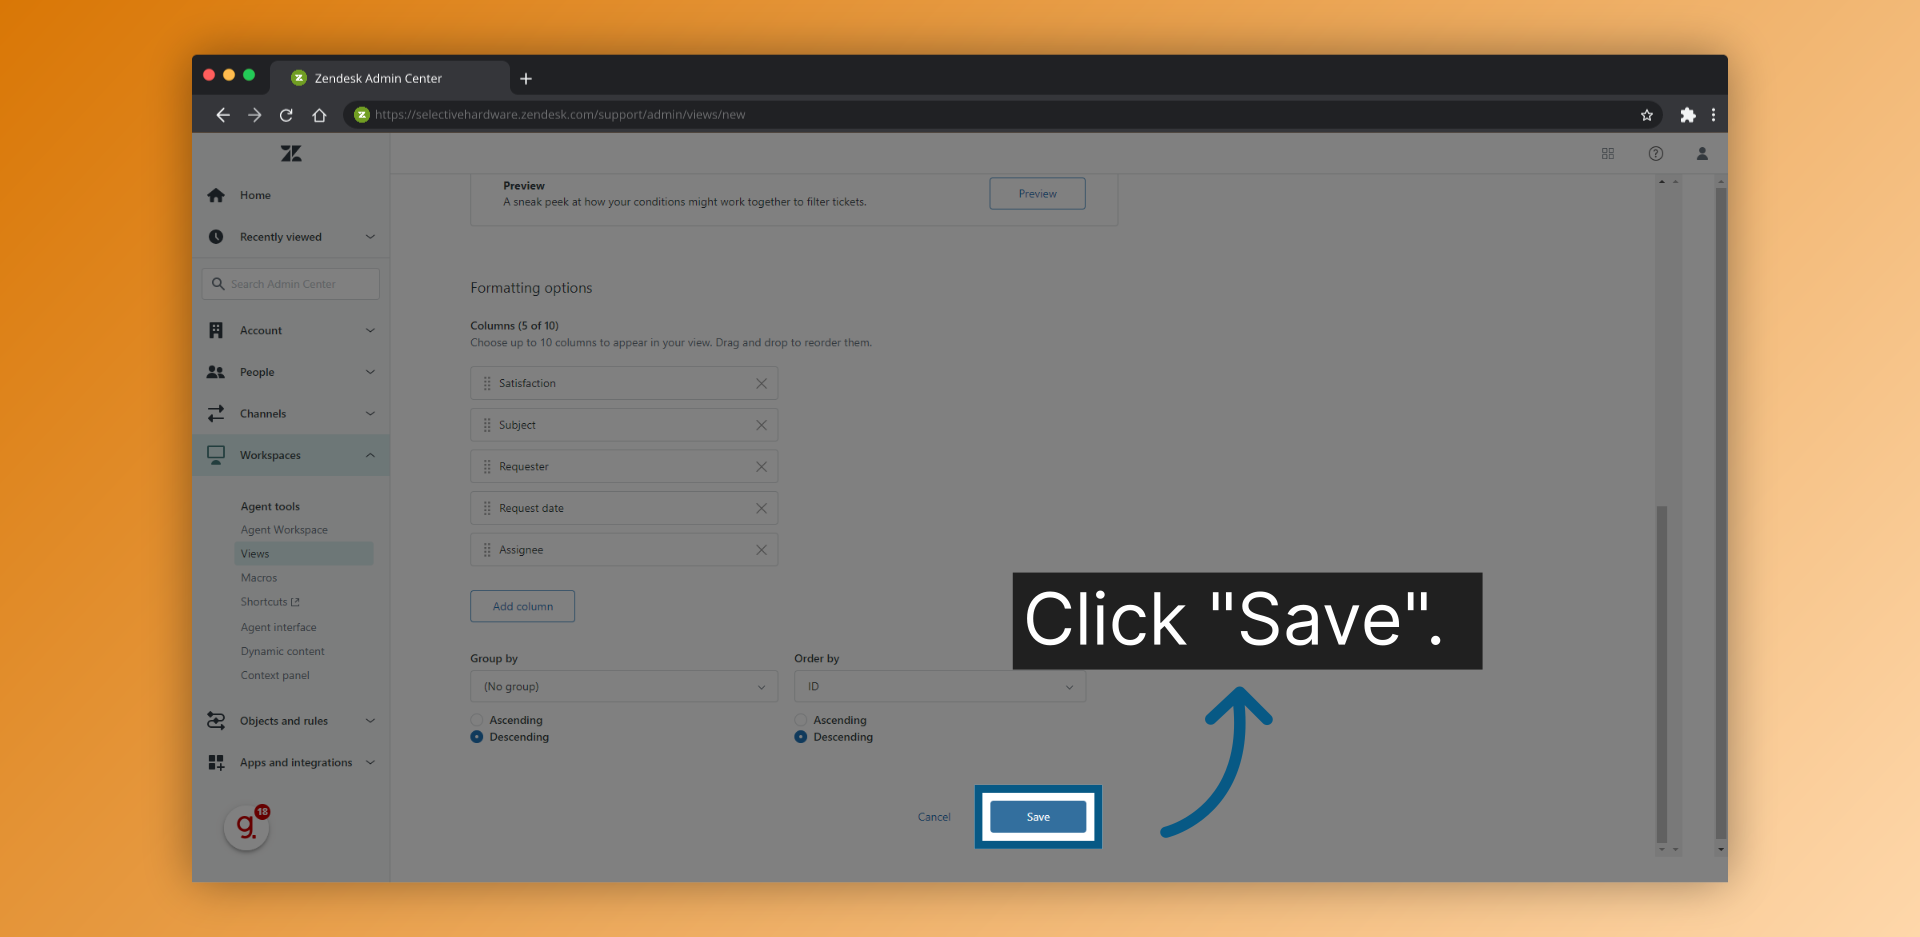
9.Click "Save".
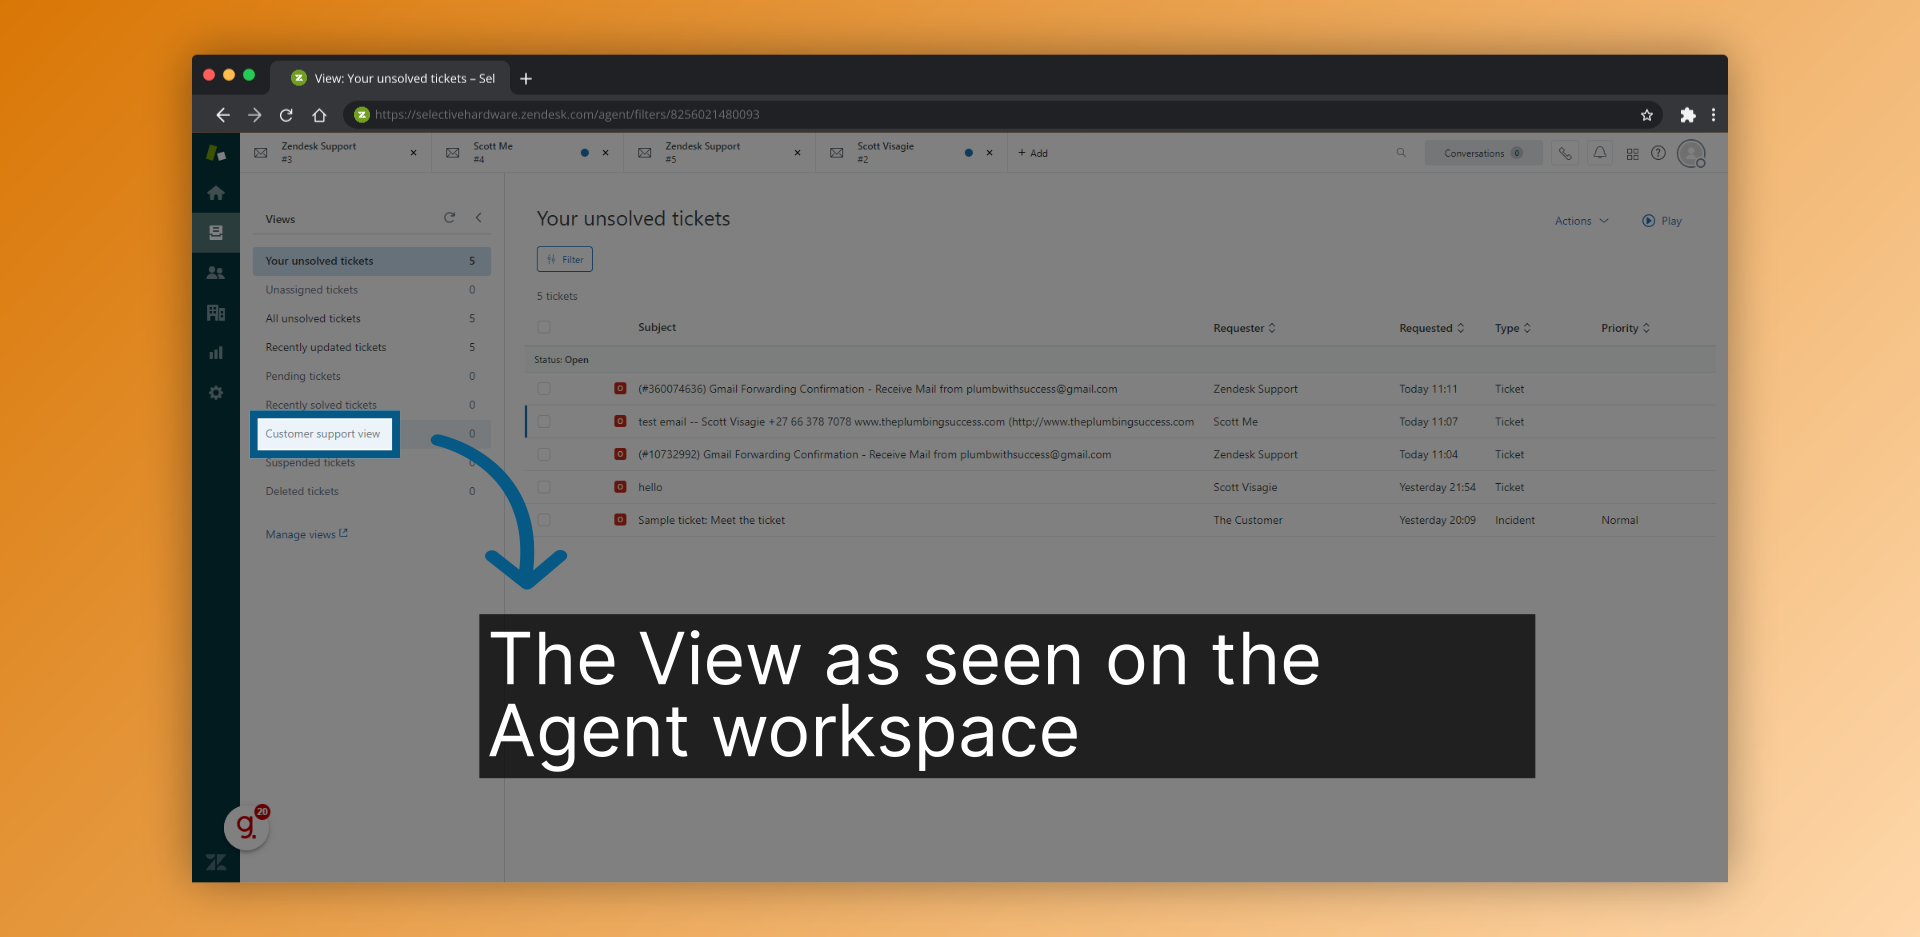
10.The View as seen on the Agent workspace
11.Thanks For Watching

Powered by Guidde


.avif)


